...have been greatly exaggerated... :)
Yes, good people, finally I return to the Angel's Talon. It's been weeks and weeks, and it's great to be back.
I'm not prepared to start promising regular updates yet. I'd feel bad if I couldn't keep those promises. I'd rather under promise and over deliver, than the other way around, so to speak.
Here's the promised tutorial on how to make a Scratch built mount for Hunter Killer Missile.
Hopefully, I'll see you again soon.
Best regards,
Stitch
Saturday, 8 August 2009
Friday, 7 August 2009
Tutorial: Scratch built mount for Hunter Killer Missile
I came up with this conversion because I needed more Hunter Killer Missiles to put on my tanks. Well, I had all the missiles I needed, but I didn't have any mounts for them, because I'd used them for the storm bolters.
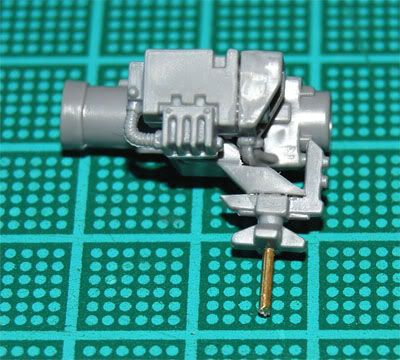
So I decided to make some on my own, and here's how you can make yours.
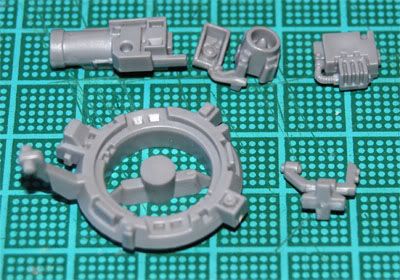 As you can see, except for the actual missile, you only need a couple of bits. The conversion is dead easy to do.
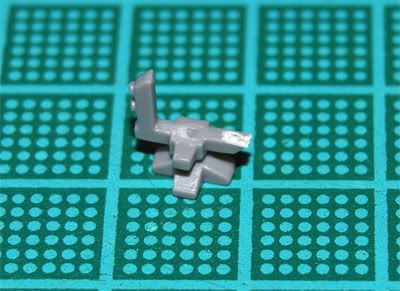
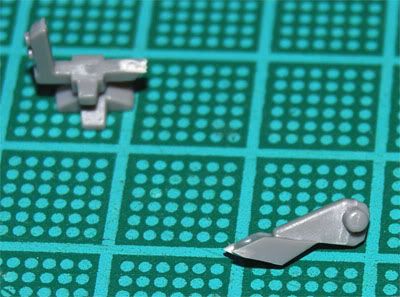
Next, you separate the mount bit from the hatch bit.
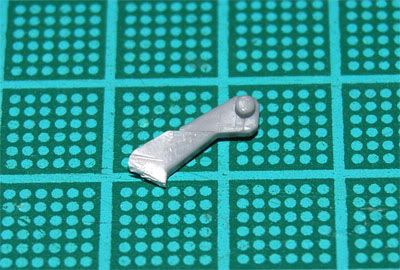
Now, clean up the mount bit with a knife. I made a straight edge, and then I trimmed this as I fitted it to the scanner mount. It'll make a lot more sense later on, so keep reading. Or look at the first photo again, and I think you'll see what I mean.
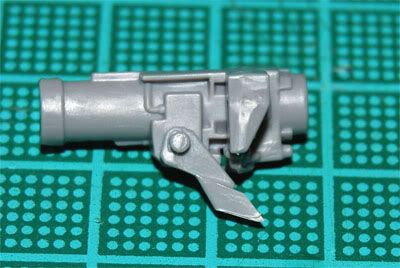
Take the mount bit and do a dry fit on the missile, don't glue it in place.
Now you need to trim away some plastic to make the mount sit at the correct angle.
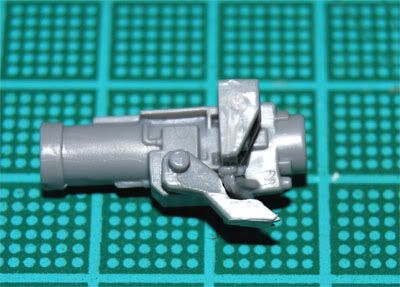
Keep trimming away plastic until it looks right. Then you glue the missile bits in place around the mount bit.
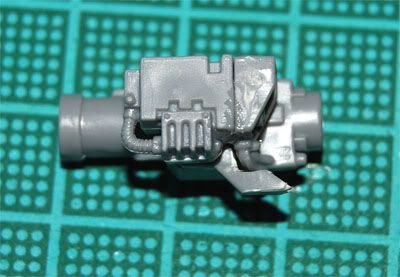
Now you just need to glue the mounted missile onto the scanner mount, and you're almost done.
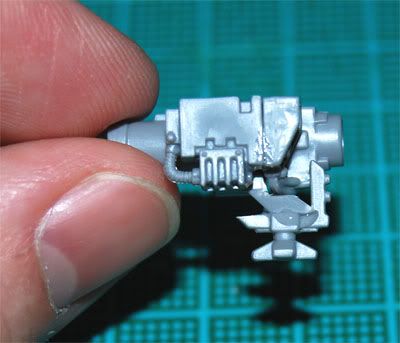
Leave it on its back for a while, to let the glue set.
I want my Hunter Killer Missiles to be removable, for two reasons. One is that it's handy to be able to remove them as you fire them. The other is transportation. If I remove them before packing the tanks in the army transport, I don't risk breaking them off. So, I drill into the mount and glue a pin in place. The pin is just a piece of a metal paper clip.

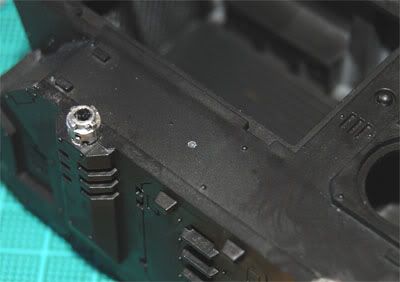
Next, I drill a hole in a suitable place on the tank...
And there you go!
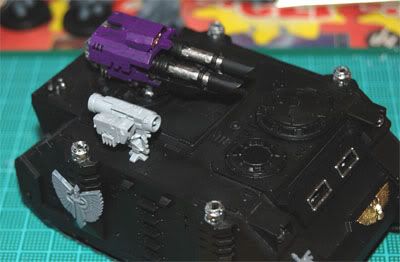
I'm sure there are a million other ways to do this, and if you've got links to tutorials, please share them! For now, though, this is what I'm doing. I think it looks pretty good.
I hope you liked this small tutorial. Please take a minute to leave a comment, it's highly appreciated!
Best regards,
Stitch

So I decided to make some on my own, and here's how you can make yours.
The Parts
These are the parts needed: As you can see, except for the actual missile, you only need a couple of bits. The conversion is dead easy to do.
Cut and Paste
First you take the mount for the "scanner", or small "radar" thingamajig, and cut off the diagonal bit. Make sure you cut it straight, so you'll get one clean edge. Clean it with a knife if needed.
Next, you separate the mount bit from the hatch bit.

Now, clean up the mount bit with a knife. I made a straight edge, and then I trimmed this as I fitted it to the scanner mount. It'll make a lot more sense later on, so keep reading. Or look at the first photo again, and I think you'll see what I mean.

Take the mount bit and do a dry fit on the missile, don't glue it in place.

Now you need to trim away some plastic to make the mount sit at the correct angle.

Keep trimming away plastic until it looks right. Then you glue the missile bits in place around the mount bit.

Now you just need to glue the mounted missile onto the scanner mount, and you're almost done.

Leave it on its back for a while, to let the glue set.
I want my Hunter Killer Missiles to be removable, for two reasons. One is that it's handy to be able to remove them as you fire them. The other is transportation. If I remove them before packing the tanks in the army transport, I don't risk breaking them off. So, I drill into the mount and glue a pin in place. The pin is just a piece of a metal paper clip.

Next, I drill a hole in a suitable place on the tank...

And there you go!

I'm sure there are a million other ways to do this, and if you've got links to tutorials, please share them! For now, though, this is what I'm doing. I think it looks pretty good.
I hope you liked this small tutorial. Please take a minute to leave a comment, it's highly appreciated!
Best regards,
Stitch
Subscribe to:
Comments (Atom)


