Because of my love for the Dark Angels, I've always used their Codex. But I haven't painted my marines as Dark Angels. Instead, I've made up a few Successor Chapters during the years. Why? The paints! Both Dark Angels Green and Blood Red gives lousy coverage on a black undercoat, and I just couldn't be bothered with thinning the paint and painting 17 layers on each miniature.
Even so, with my own colour schemes, I've never finished an army. I've always tweaked the color scheme, or changed the chapter symbol, etc, etc... Now though, I've finally decided to paint actual Dark Angels, thanks to the Foundation Paints.
The Foundation Paints are awesome, and the two main colours I use are Orkhide Shade and Mechrite Red. Orkhide Shade covers black in one coat. Mechrite Red doesn't cover as good, but it still only needs two coats.
I won't go into detail on different techniques, as it is beyond the scope of this tutorial. If you do not already know what Drybrushing is, for example, I sincerely recommend the book How to Paint Citadel Miniatures from Games Workshop. It explains all these techniques better than I ever could.
Please note that this tutorial is about painting an army, not winning painting competitions. I'm not even close to a Golden Daemon standard miniatures painter, and neither do I aspire to be one. The important thing for me with my miniatures is that they look good on the table, and that means they only have to look good at arms length.
So, here is how I paint my Dark Angels, step by step:
- Undercoat
- Base coat
- Bolter casing
- Metal bits
- Chest eagle + skulls
- Purity seals
- Eye-lenses
- Touch-up
- Highlighting
- Shading metal bits + purity seals
- Finishing touches on purity seals
- The base
Just a note on brushes and paints. Unless otherwise noted, all paints and brushes used in this tutorial are from Citadel/Games Workshop. You are, of course, free to use whatever painting supplies you like, but it's worth mentioning for the purpose of brush size, for instance.
Now, let's get down to business!
1. Undercoat
I use a black undercoat for my Dark Angels. As you will see later on, this creates almost all the shading I need. Nowadays I almost exclusively use Matt Black Primer from The Army Painter, but Games Workshop's Chaos Black will work just as well.
I won't go into more detail, but I'll just mention that I always glue any basing material (sand, grit, etc) to the base before undercoating. The spray paint will help hold the material in place, so it doesn't come off during painting. After finishing the undercoat with some Chaos Back paint and a Standard brush from GW, filling in the areas missed by the spray, it's time for the base coat. Read on.
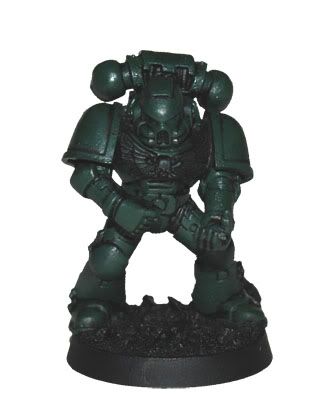
2. Base coat
Overbrushing is basically the same as drybrushing, but with more paint in the brush. By using this technique, you can still see the black in the recesses of the armour. The base coat is all Orkhide Shade, straight from the pot. I seldom thin my paints, and I almost never mix paints. For this step, I use a Standard brush.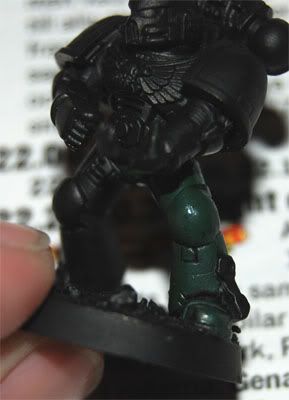
Don't worry if you cover some of the detail up. When the marine is on the table with his brothers, no one will notice!

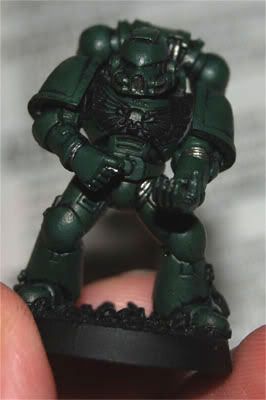
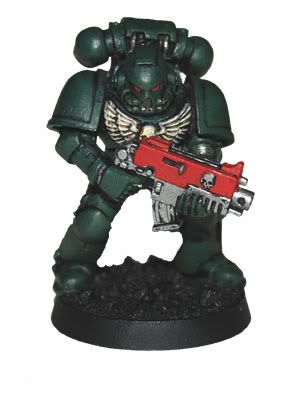
When finished, the marine should look something like this:
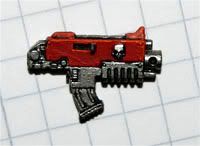
3. Bolter casing
For this step, I use a Detail brush. I paint the casing of the bolter with Mechrite Red. Two coats will do nicely. Take care to let the black show in the recesses. But, again, if you cover some of the detail, don't worry about it.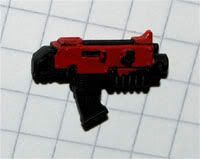
When the Bolter is not attached to the arm (such as with some of the Dark Angels Upgrade bits), I usually don't glue it in place until after painting. This makes it easier to paint the chest of the marine. Remember to use a water based glue when you glue the Bolter in place, as plastic glue (poly cement) can dissolve and smear the paint, and super glue can leave ugly traces if you get it in the wrong place.
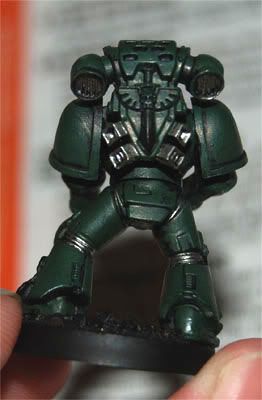
4. Metal bits
Using a Detail brush, I paint all metal areas with Boltgun Metal. This means most of the joints of the armour, plus exhausts on the backpack, etc.Back:
Front:
Overbrushing is great for the Bolter as well, leaving some black showing for the deeper shading:
Don't worry if you get some Boltgun Metal in the wrong place. We will take care of that in Step 8: Touch-up.
5. Chest eagle + skulls
Overbrush the chest eagle and any skulls, etc, with Calthan Brown, again leaving some black showing.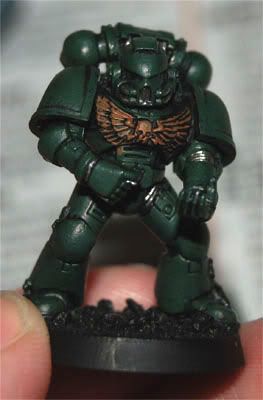
Back:
Now, drybrush the same details with Bleached Bone. A few thinner coats is better than a thick one. You want some of the brown and black to show through:
And the back again:
6. Purity seals
Paint the wax Mechrite Red. It's ok to leave some black showing along the inner edge. Paint the parchment Bleached Bone. You may need to apply two or even three coats.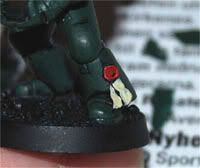
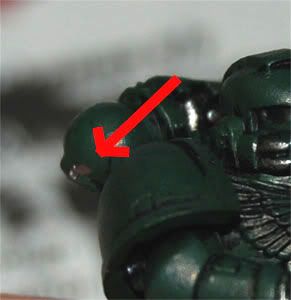
7. Eye lenses
The eye-lenses get a thin coat of Mechrite Red with a Fine Detail brush. Take care to leave some black around the edges. This is usually one of the few steps where I thin the paint slightly, taking care to only use the very tip of the brush.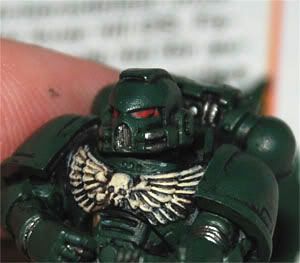
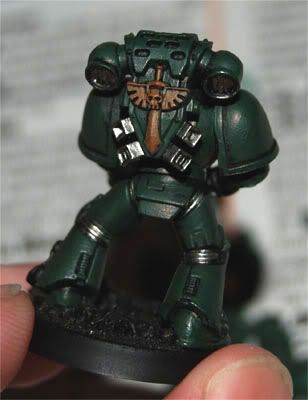
8. Touch-up
This is where I fix the base coat by covering up all the little mistakes I've made along the way, such as the backpack shown under Step 4: Metal, and the eye shown just above this paragraph.After Step 8, this is what we've got so far:
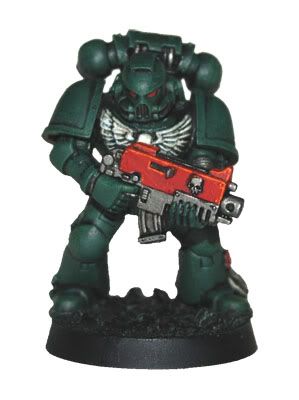
Not bad, if I say so myself. In fact, if you're happy with this, just skip the rest of the steps. Together with an army painted in the same way, this guy would look good on a table as he is.
I'm not entirely satisfied, though.
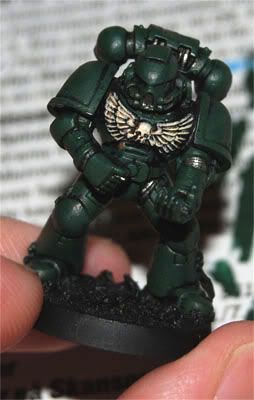
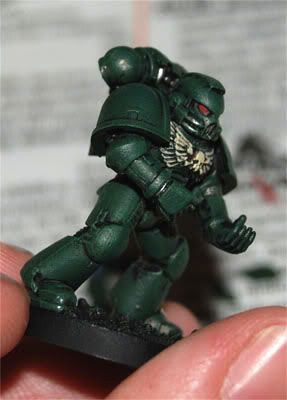
9. Highlighting
Using a large brush, I now lightly drybrush almost the entire model with Gnarloc Green.Now, when I say lightly, I mean it. I just want a hint of a lighter green on the edges of the armour. And, when I say almost the entire model, I mean you need to take care not to discolour the chest eagle and other non-green details.
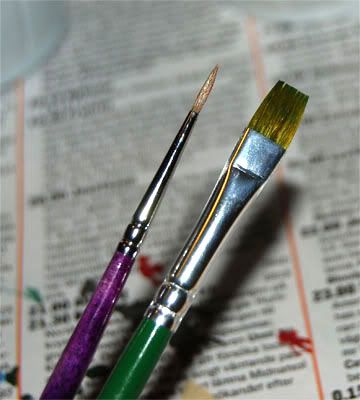
The brush I use for this step is a cheap, but decent quality, brush with synthetic bristles. (The brush on the left is a Standard brush, shown for size comparison.)
I highlight the red areas, such as the Bolter casing, with Macharius Solar Orange. To do this, I thin the paint just a bit and carefully brush it along the edges of the areas to be highlighted. I also apply some Macharius Solar Orange on the raised rivets to make them pop out just a bit.
I carefully drybrush the chest eagle and other bone details with Skull White. Not all over, just a bit to give it a little extra highlight.
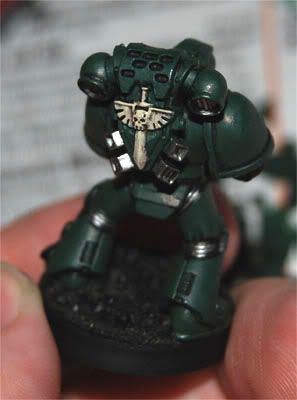
10. Shading metal bits + purity seals
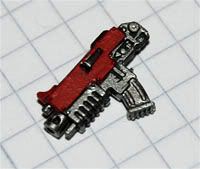
In this step, all metal bits get a coat of Badab Black wash. I really like the new Citadel washes. You can see why in the picture below. That's the old Black Ink on the left Bolter, and Badab Black on the right.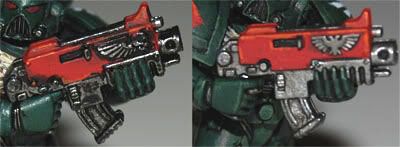
After the metal bits, the entire purity seal gets the same treatment. Feel free to leave a little pool of Badab Black in the middle of the wax seal, to give it some extra depth.
11. Finishing touches on purity seals
After I am sure that the Badab Black wash is completely dry, I highlight the wax with some more Mechrite Red along the edge and in the middle. I then scribble some wavy lines and dots on the parchment with a black fineliner pen.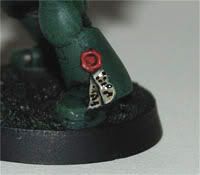
Almost done!
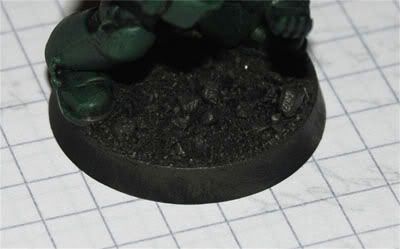
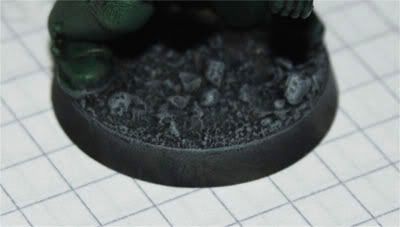
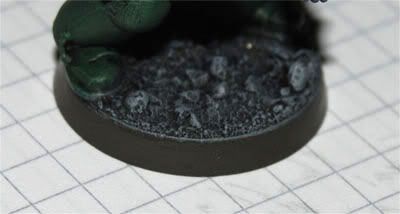
12. The base
Unfortunately, due to the blue light of the camera flash, the pictures of this step didn't come out so well, but I'm sure you get the idea.I start with overbrushing the top of the base with Charadon Granite.
I then apply a heavy drybrushing of Adeptus Battlegrey, followed by a lighter drybrushing with Codex Grey, and finally a light drybrushing with Fortress Grey.
If, during any of these stages, I get any grey paint on the marine's feet, I just let it be, unless I really make a mess. After all, he's walking around in it, it's only reasonable that some of it is going to stick to his boots.
After this, all that is left is the edge. Using a Standard brush, I apply a generous coat of Charadon Granite all along the edge, taking care to leave the drybrushed top edge.
That's it!

Thanks for reading. Please join me next month for a step by step tutorial on how I paint the Chapter symbol and squad markings!
If you like or dislike this article, please leave a comment and let me know!
You can also e-mail me at stitch [at] roll2dice [dot] com.
/Stitch


18 comments:
Excellent tutorial, thanks for the effort!
Glad you like it, thanks for leaving feedback!
I came across your blog/painting guide in a search on how to paint Space Marines. Im basing my army off the Space Wolves, but decided to use dark angel green as my base with shining gold marking like the Ultramarines. Your guide is working out for me prity well so far, only problem I have is all my minis are together already so I have had to improvise on the eagels. I cant seem to get to the wings under the arms/weapons, but otherwise its looking good. I plan to post a few pics when im able to. If you would like more info what im doing to my SM army please ask.
I just bought a Space Crusade box and plan to paint the figures. Therefore, any article giving help and advice about this matter is appreciated.
Thanks for your explanations and photos!
After hours and hours of research to learn how to paint my new Warhammer Fantasy armies, this is still one of the best tutorials I've ever seen. I shamelessly copied your base technique to paint a Dwarven wall and it looks so realistic I can't believe I did it. But everything you've said here is with clear, effective language that most tutorials lack--in other words, this tutorial is so good, you taught me how to paint Goblins and Dwarves with it!
Looks great!
I really like Orkhide Shade.
It suits Dark Angels really well and the hue is more like the old Dark Angels green that came in the hexagon bottles.
Can't wait to see the Rhino :)
Ha det så trevligt med Space Hulk nu!
(Bara lite bitter över att behöva vänta tills den 5e) // Andreas
Hey cheers brilliant marine
... wats purrity seal?
i'm only just starting and was gonna do BA but thought DA were more awesome
so wats purity seal? ty
@master.mccabe:
A purity seal is one of those pieces of parchment hanging from a wax seal on the armour of a lot of space marines, as seen in this picture:
http://i562.photobucket.com/albums/ss70/AngelsTalon/Tutorials/Painting%20Dark%20Angels/DA-tut16_PuritySeal.jpg
Cheers stitch - saved me scouring the web for that :)
so what is the purity seal for? or is it just more decorations xD
ello me again
cnt thnk of army list :/ bought the battle force and now stuck
5 assault - 10 tac - 5 combat mariens - 5 scouts - 1 rhino
I'm stuck for an army from there
You could easely make a 500 point army with the space marine battleforce box set. Actuly, thats where I started at. Just use the space marine codex and you will be fine.
@master.mccabe:
The purity seals are mostly for decoration, on the actual models. But in the Warhammer 40000 universe, they are covered in blessings and prayers to protect or empower the warriors.
The battle force is a solid start for an army, so good on you for beginning there!
The next thing I would buy would probably be a Space Marine Commander. It's an awesome boxed set that will give you a kick ass commander, and a ton of extra bits with which to kit out your veteran sergeants and others.
To add some more firepower, a Heavy Support choice might be nice. A Devastator Squad is a good option if you want more men. If you'd rather have a tank, I would go for a Predator.
And Terminators and Dreadnoughts are awesome fun, both to build and to play with.
And I'm always interested in seeing what other people are doing! So Boondale, mccabe and all the rest of you, feel free to post links to your own blogs and pictures in the comments! I may not have time to comment on everything, but I'll certainly have a look!
@ Stitch I would love to show what I have done but alas, I dont have a cam to do so :-( So far though I have most of my army in the base color that I chose (Dark Angel Green). All I have left to finish painting DAG is my comand squad, rhino, drop pod and my HQ (Commander, librarian and chaplen). I did pick up the small Legion of the Damned squad box from my local hobby shop. Im going to finish what I already have before messing with those.
hey just come across you paint guide by luck im quite a veteran and always like to find new paint guides tend to get fed up wi the same old colours and your rite with the dark angel green it can be a pain and ive always ad to use a few coats but ive just lived with it but think im going to give the foundation colours ago never used them before so thanks and if u have any good ideas for the flames on the legion of the damned please reply
Awesome tutorial, can't wait to get started on the 55 marines I have to paint for my DA army.
Outstanding tutorial, Stitch. At first I was skeptical about using colors other than DA Green, but now that I have a finished model in hand, count me as a believer!
Here's my blog entry that shows the results of my efforts:
http://theleaddragon.blogspot.com/2011/05/dark-angels-tactical-trooper-done.html
Thanks again!
I am so excited to read your post!!
I too have a nasty, disgusting, stained
living area of carpet that we have been considering ripping
out and painting/staining the concrete floors. Every where we had looked
they gave this very drawn out, time consuming process but we suspected we could do it
some other way! After reading this, that carpet is H-I-S-T-O-R-Y!!
photo to paintings
picture to painting
pictures to paintings
photo into painting
wedding painting
This was an awesome tutorial and this made my models look amazing. I have always been terrible at painting the models but this really helped. Keep up the great work!
Post a Comment