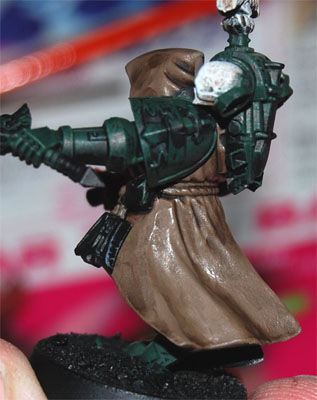
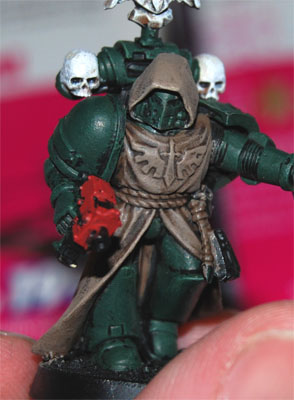
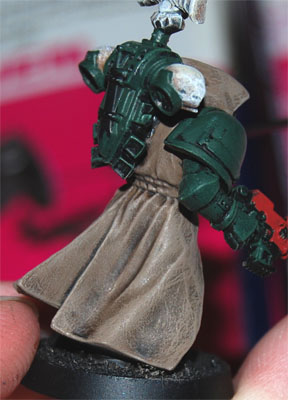
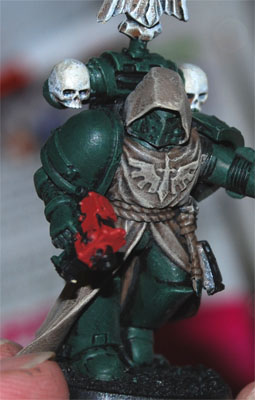
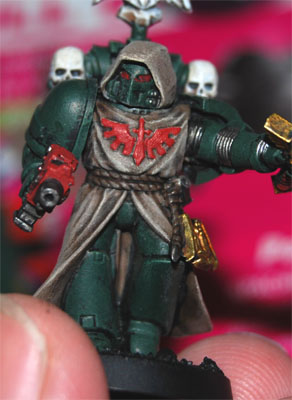
Wow... First post since july.... And the first post of 2011! Let's see if I can breathe som life back into this blog, eh?
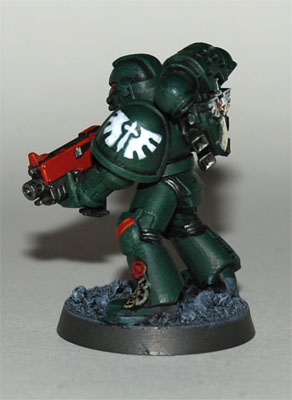
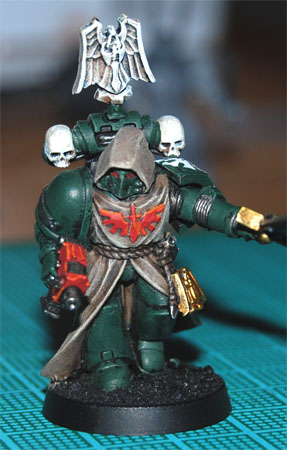
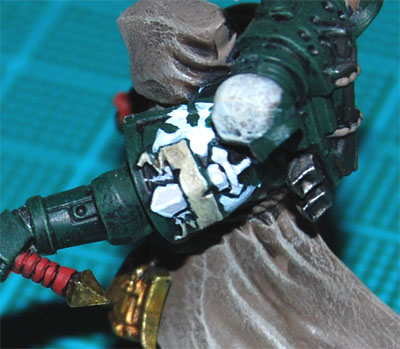
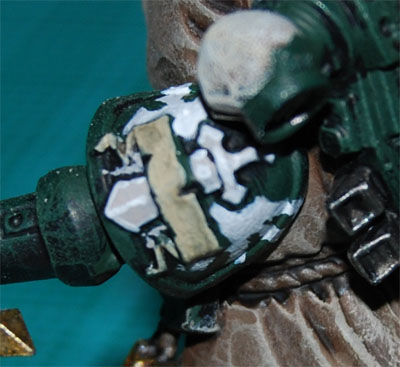
The good news is that I'm feeling a lot of motivation coming back, so I've actually picked up my Dark Angels project again, right where I left it: the three marines from 3rd Tactical Squad, 3rd Company.
And here they are:
As you can see, they're almost done. So, what prompted this activity? Well, recently, there's been a lot of hobby activity in the local 40k community, and it's really inspiring! I decided to organize a painting night and invited some friends, and it was great fun! We were six people, talking, laughing and painting. Hopefully, we're doing this again soon.
These guys just need some minor highlighting done, and of course the chapter symbol on their left shoulder pads. That's next session, and then I get to finally cross out some more men on my goal sheet!
/S
Showing posts with label painting. Show all posts
Thursday, 3 February 2011
Monday, 5 July 2010
Another monday, another painting session
Honestly, I didn't really feel like painting today, but I did anyway. Again, it was just a little, but I did finish all the skulls and chest eagles on the three marines I'm working on. Sorry, no picture.
I do feel that I'm getting closer, though. Another session, or two, and these marines will be done. Only three models done in several months may seem like nothing, but compared to zero, it's actually quite a lot!
See you next week!
/S
I do feel that I'm getting closer, though. Another session, or two, and these marines will be done. Only three models done in several months may seem like nothing, but compared to zero, it's actually quite a lot!
See you next week!
/S
Labels:
3rd co,
40k,
dark angels,
painting,
progress report,
space marines,
tactical,
work in progress
Monday, 28 June 2010
Progress report: 3rd Tactical Squad
Last monday, I decided to start painting at least a little bit each week. So, for today I continued painting the three marines from last week.
Today's grand total: Metal bits
That's it. Not much, but a hell of a lot more than nothing. :)
And here they are:
I'm really glad the project is moving forwards again.
See you next week!
/S
Today's grand total: Metal bits
That's it. Not much, but a hell of a lot more than nothing. :)
And here they are:
I'm really glad the project is moving forwards again.
See you next week!
/S
Labels:
3rd co,
40k,
dark angels,
painting,
progress report,
space marines,
tactical,
work in progress
Monday, 21 June 2010
Painting again
(Wow, I just realized this blog has been dead for eight months... That is sad. I haven't even been building or painting anything for those eight months, either, which is even more sad...)
Today, I finally dug out some Space Marines that I started painting months ago, and took the time to sit down and dip some brushes. It felt really good. The new plan is to do what I did last year, paint at least a little every week, but on mondays.
So, what did I do tonight?
Three marines, two with bolters and one with missile launcher, got a touch up on their Orkhide Shade base coats, and also got a brand spanking new base coat of Mechrite Red on their shooty bits.
Not much, but it does bring me that much closer to my goal of a complete Battle Company.
I'm really glad I did this tutorial a couple of years ago, because it's now been so long since I painted, I need it to remember what to do!
Labels:
3rd co,
dark angels,
painting,
space marines,
tactical
Saturday, 17 October 2009
3rd Co. Command Squad - DONE!
Yes! Tonight, I finished the Company Master and his Command Squad, and it feels really good!
Pictures? Coming up!
That means six more boxes crossed on my 1000pt army Goal Sheet...
...but it also means six more crosses on my Battle Company goal sheet!
The command Razorback is about 35% done, as is the Predator. The second Rhino, though, got some more paint tonight, as well, and is at about 65-70%. I'm hoping to finish it next painting session.
See ya later!
/Stitch
Labels:
3rd co,
40k,
command squad,
dark angels,
deffcup,
goal sheet,
master,
painting,
progress report
Saturday, 10 October 2009
Progress Report: Company Master & Command Squad
I'm feeling pretty good after last night's painting session. I got more work done than I'd planned, which is really nice. I can definitely believe this squad will be finished in another session, or two, max.
Here are some pictures:

The Master and the Sergeant (powerfist) are completely done, except for the bases.

I decided to paint the Company badge on their right shoulder pads, to mark them out as the Command Squad and connect them to the company.

And here's a close-up of the Chapter Badge on the Sergeant:

Already looking forwards to next Friday, when I'll sit down for another painting session!
/Stitch
Labels:
3rd co,
badge,
characters,
command squad,
dark angels,
markings,
master,
painting,
progress report,
work in progress
Tuesday, 6 October 2009
New pictures! (Command Squad WIP + Rhino)
Yep, I'm finally going to show you what's been going on lately! :)
First up, here are the Company Master and his Command Squad, as of yesterday. Actually, I discovered that I lied in my last post. I listed what was left to do, but I forgot about highlighting the red bits, so add that to the list. Here they are, work in progress, remember: (click for bigger picture)

And here's the finished Rhino of 1st Tactical Squad 3rd Company: (click for bigger pictures)


There are a couple of details I'm not 100% happy with: the "1" on the front should be centered, and I think the Chapter Badge on the left door is a bit wonky. But I decided right away that I won't re-do them. It would just waste time, as I think they're "good enough". I honestly think I won't even think about it when the tank is on the table with a bunch of other painted minis. On the whole, I'm just so darned pleased that I'm making progress, and I can't wait to field a completely painted army!
I want to thank Drathmere for his comment on my last post, and encourage everyone to visit his blog: http://40khobbyblog.blogspot.com/ (Great stuff!)
See you soon!
/Stitch
Labels:
3rd co,
command squad,
dark angels,
master,
painting,
progress report,
rhino,
work in progress
Saturday, 3 October 2009
Progress! I'm painting again!
Yes, you read it correctly. I'm painting again, and making good progress. A major motivating factor was this comment on my original Dark Angels Painting Tutorial, so thanks Andrew for the positive feedback!
For the past two months, I've been painting every friday night, and I've actually got som progress to show for it. Unfortunately, I don't have my camera with me right now, so pictures will come later. The camera in my iPhone is worthless for taking pictures of miniatures, but here's a picture of my updated Goal Sheet:
As you can see, both Tactical Squads and one Rhino are now completely done. What you can't see is that everything else is base coated. I didn't finish the army for the Deffcup, of course, but I managed to cover everything in the minimum three colours so I could play in the tournament.
As I said above, I'm now painting every friday night and my Company Master and Command Squad are almost done. The only things left to paint are the wings on the Master's helmet and the squad/company markings on all six marines. Oh, and the bases. I'm expecting to complete them all in two or three more sessions.
Pictures will follow soon, I hope. I also hope to get back into updating the blog more often, but I'm still not going to make any promises I don't know I can keep. :)
/Stitch
Sunday, 1 February 2009
Work in progress: Veteran Sergeant
I promised to show you more of this guy in January's update, but I didn't deliver, did I?
Unfortunately, he's still not finished... But, here are some more work in progress pictures of the Veteran Sergeant of 2nd Tactical Squad 3rd Company:


I thought I'd try letting the wings go up over the trim of the shoulder pad, and I'm unsure about the result, but from a distance it looks pretty good. And that's good enough for me. :)


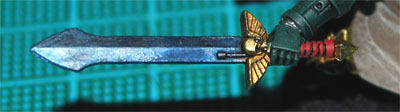
The blade of the power sword didn't quite turn out the way I wanted it, so I may re-paint that, but I'm pretty happy with the gold.
Comments and critiques are welcome, as always!
/Stitch
Monday, 1 December 2008
Painting Tutorial: Robes
I'm currently painting my second squad of marines, and I thought this would be a good time to do a step-by-step tutorial on how I paint robes. I love the warrior monk theme of the Dark Angels, and I plan to have robes on most, if not all, of my veteran sergeants and other characters.
My usual painting disclaimer: Please note that this tutorial is about painting an army, not winning painting competitions. I'm not even close to a Golden Daemon standard miniatures painter, and neither do I aspire to be one. The important thing for me with my miniatures is that they look good on the table, and that means they only have to look good at arms length.
Dark Angels robes, step by step:
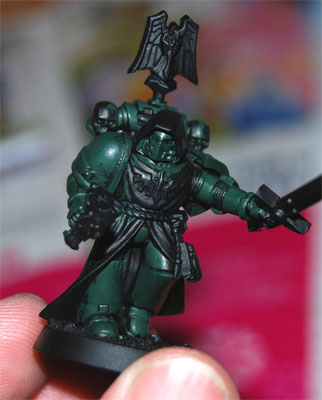
Right, here he is, the Veteran Sergeant of 2nd Tactical Squad, 3rd Company:

The armour, metal bits, markings and bone coloured details will be painted in exactly the same way as in my earlier tutorials, so I won't repeat every step here. You can check them out here:
Here we go...
As you can see, I have just painted over the Dark Angels insignia on his chest. This will be painted red later on, to stand out and add some contrast.

And from the back:


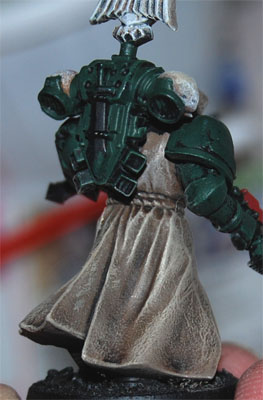
And again, here's a view from the back:


Back:

Almost done...
This last image is from a later stage of the painting process. You'll see more of this guy in next months update...
Of course, there's a million different ways of doing it, but this is how I paint the robes on my Dark Angels. It's quick, it's easy, and it looks good enough, I think. Please tell me what you think by leaving a comment, or emailing me.
/Stitch
My usual painting disclaimer: Please note that this tutorial is about painting an army, not winning painting competitions. I'm not even close to a Golden Daemon standard miniatures painter, and neither do I aspire to be one. The important thing for me with my miniatures is that they look good on the table, and that means they only have to look good at arms length.
Dark Angels robes, step by step:
- Basecoat
- Shade, wash
- First highlight, heavy drybrush
- Final highlight, light drybrush
- Rope: Wash
Right, here he is, the Veteran Sergeant of 2nd Tactical Squad, 3rd Company:

The armour, metal bits, markings and bone coloured details will be painted in exactly the same way as in my earlier tutorials, so I won't repeat every step here. You can check them out here:
- Painting Tutorial: Dark Angel Space Marine
- Painting Tutorial: Dark Angels markings, part 1
- Painting Tutorial: Dark Angels markings, part 2
Here we go...
1. Basecoat
First, paint the robe with Khemri Brown. Even though it is a Foundation Paint, two coats may be needed to get an even coat.
As you can see, I have just painted over the Dark Angels insignia on his chest. This will be painted red later on, to stand out and add some contrast.2. Shade
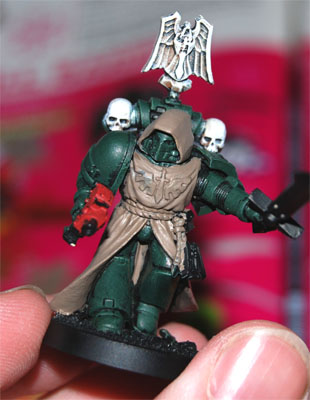
Now splash on a generous wash of Devlan Mud, to provide some basic shading.
And from the back:

3. First highlight
Give the robe a heavy drybrushing of the base colour, Khemri Brown, for the first highlight. Ignore the piece of the robe showing between his legs. It's difficult to reach, and it'll look better shaded anyway.
And again, here's a view from the back:

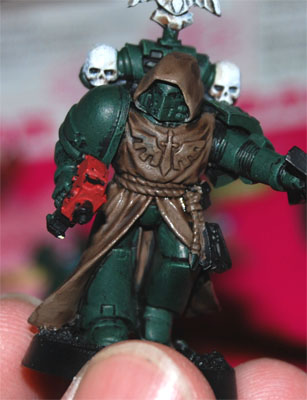
4. Final highlight
For the final highlight, drybrush the robe lightly with Bleached Bone. Pay special attention to the edges. Again, never mind the piece of robe showing between his legs.
Back:

Almost done...
5. Rope
Now you just give the rope a wash of Badab Black, and you're done!
This last image is from a later stage of the painting process. You'll see more of this guy in next months update...Of course, there's a million different ways of doing it, but this is how I paint the robes on my Dark Angels. It's quick, it's easy, and it looks good enough, I think. Please tell me what you think by leaving a comment, or emailing me.
/Stitch
Monday, 1 September 2008
Painting Tutorial: Dark Angels markings, part 2: the Chapter Symbol
Here's how I paint the Dark Angels chapter symbol on my models. I never thought I would be able to pull it off, but when I look at my finished models I think they look pretty damn good.
My usual painting disclaimer: Please note that this tutorial is about painting an army, not winning painting competitions. I'm not even close to a Golden Daemon standard miniatures painter, and neither do I aspire to be one. The important thing for me with my miniatures is that they look good on the table, and that means they only have to look good at arms length.
Dark Angels chapter symbol, step by step:
Now, it's time to turn a green space marine into a Dark Angel!

For steps 1-3 I use thinned down Dheneb Stone, as it gives better coverage than Skull White.


Now, I just mirror the design on the other side for the left wing:

When this is done, I fill in the wings with Dheneb Stone.

After the white paint is completely dry, I clean up the edges a bit with Orkhide Shade.


Two more strokes with Orkhide Shade finishes off the right wing.

Then I just do the same thing with the left wing, and I'm almost done!

Right! The anonymous green space marine from the first two tutorials is now a proper Dark Angel!


As always, thanks for reading.
If you like or dislike this article, please leave a comment and let me know!
You can also e-mail me at stitch [at] roll2dice [dot] com.
/Stitch
My usual painting disclaimer: Please note that this tutorial is about painting an army, not winning painting competitions. I'm not even close to a Golden Daemon standard miniatures painter, and neither do I aspire to be one. The important thing for me with my miniatures is that they look good on the table, and that means they only have to look good at arms length.
Dark Angels chapter symbol, step by step:
- Paint a cross
- Turn the cross into a sword
- Paint the basic shapes of the wings
- Fill in with white and clean up
- Finish the wings
- Clean up
Now, it's time to turn a green space marine into a Dark Angel!
1. Paint a cross
To begin with, I paint a thin cross. This will become the sword. Not completely straight? Never mind! It'll look great when it's finished!
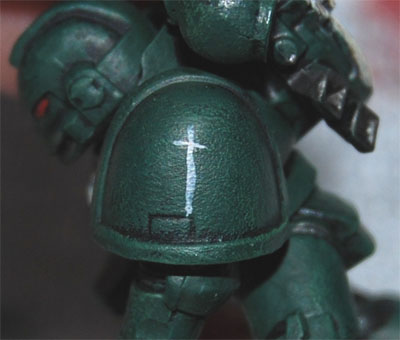
For steps 1-3 I use thinned down Dheneb Stone, as it gives better coverage than Skull White.
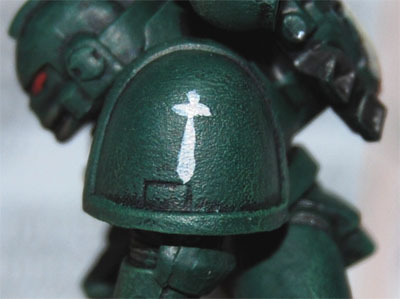
2. Turn the cross into a sword
Now I flesh out the cross and turn it into a sword of sorts.
3. Paint the basic shapes of the wings
Now I paint the contours of the wings. Here's how I do it, step by step:
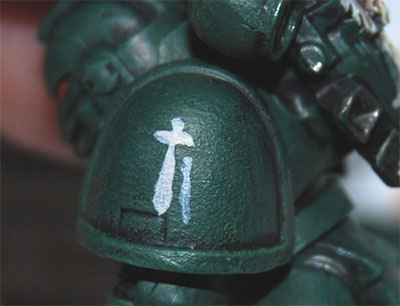
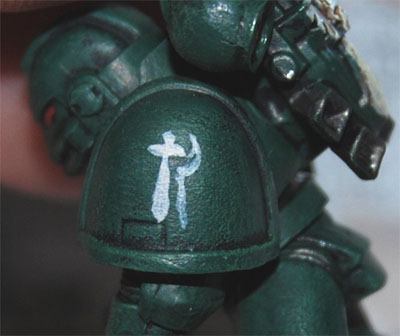
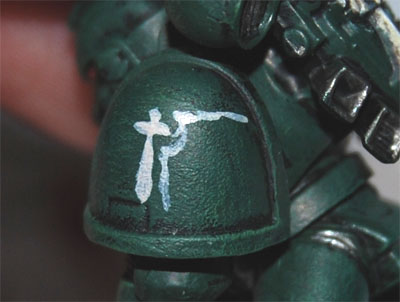
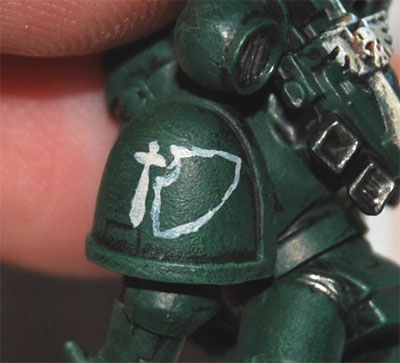
Now, I just mirror the design on the other side for the left wing:
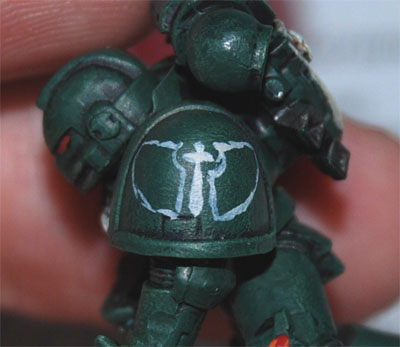
When this is done, I fill in the wings with Dheneb Stone.
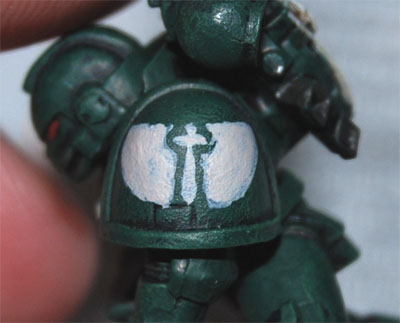
4. Fill in with white and clean up
Now it's time to fill in the entire design with Skull White. Skull White really needs to be thinned down, so I mix in plenty with water and paint several coats. It's important to let each coat dry before applying the next.After the white paint is completely dry, I clean up the edges a bit with Orkhide Shade.
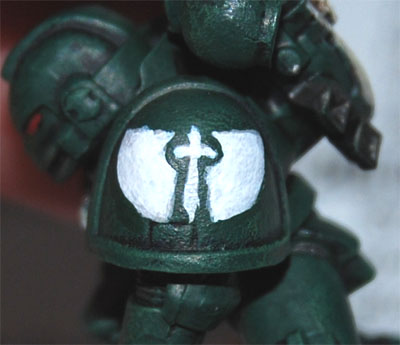
5. Finish the wings
To get the "feathers", I just paint Orkhide Shade over the Skull White, starting in the middle.
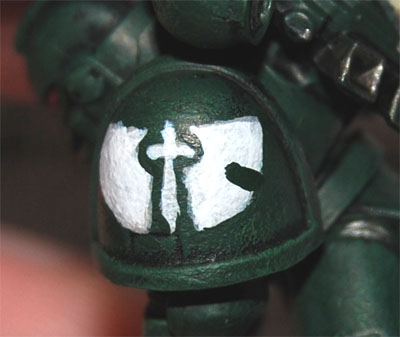
Two more strokes with Orkhide Shade finishes off the right wing.
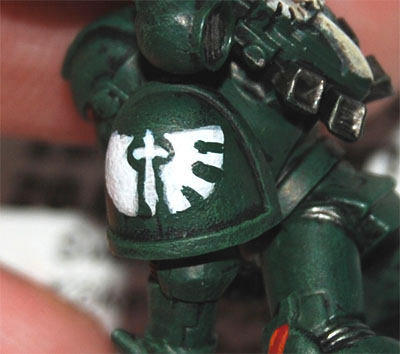
Then I just do the same thing with the left wing, and I'm almost done!
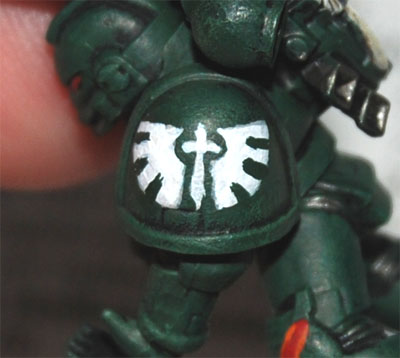
6. Clean up
If I need it, I finish up with some more Skull White and Orkhide Shade to clean up the design. But, as I keep reminding you (and myself!), it doesn't have to be perfect!Right! The anonymous green space marine from the first two tutorials is now a proper Dark Angel!
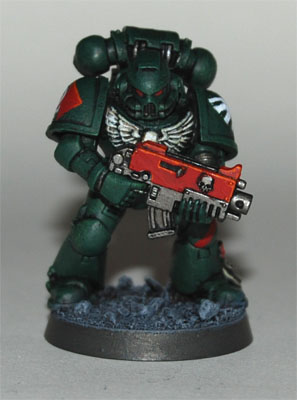

As always, thanks for reading.
If you like or dislike this article, please leave a comment and let me know!
You can also e-mail me at stitch [at] roll2dice [dot] com.
/Stitch
Labels:
40k,
dark angels,
markings,
painting,
space marines,
tutorial
Subscribe to:
Posts (Atom)