Usual painting disclaimer: Please note that this tutorial is about painting an army, not winning painting competitions. I'm not even close to a Golden Daemon standard miniatures painter, and neither do I aspire to be one. The important thing for me with my miniatures is that they look good on the table, and that means they only have to look good at arms length.
Up close and personal my Dark Angels look a little messy. No two chapter symbols or numbers are exactly the same, for instance. But I believe that that's the secret to painting an army. I had to struggle in the beginning, because, like a lot of people, I would like my army to be perfect. But I also want it done this millennium, preferably within a year or so. So I had to let go of the dream of a perfect army, in favor of the much more reasonable goal of a completed army that looks good on the table.
Dark Angels 3rd Company and Tactical Squad markings, step by step:
- 3rd Co badge, left knee
- Tactical symbol, right shoulder pad
- Highlighting
- Clean up
- Squad number, right shoulder pad
- Clean up
As usual, a note on brushes and paints. Unless otherwise noted, all paints and brushes used in this tutorial are from Citadel/Games Workshop. You are, of course, free to use whatever painting supplies you like, but it's worth mentioning for the purpose of brush size, for instance.
Now, let's get painting!
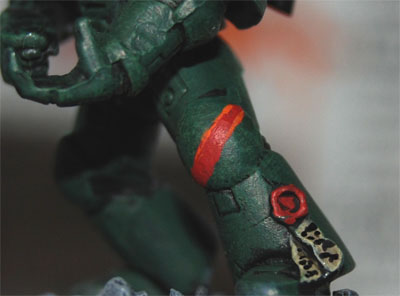
1. 3rd Co badge, left knee
The 3rd company badge couldn't be easier. I just paint a line of Mechrite Red diagonally across the left knee. On marines with mk 6 legs, without knee pads, I paint the line across the entire lower leg. I think it adds to the variation, but in a way that still ties the miniatures together.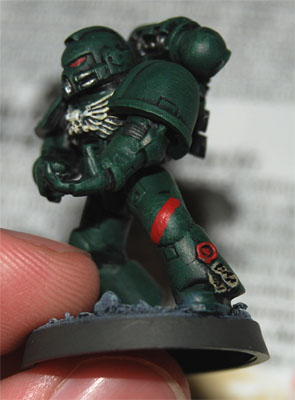
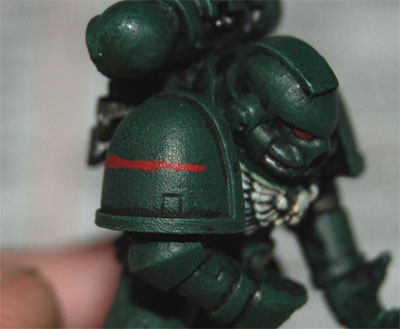
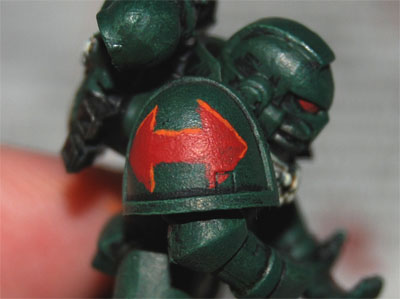
2. Tactical symbol, right shoulder pad
The secret to painting these kinds of symbols, at least for me, is to divide them into separate, simpler shapes.I also thin my paint a bit, just to maintain a little better control over the point of the brush.
For the tactical double arrows, I start with a simple line in Mechrite Red:
Then I paint the basic arrows.
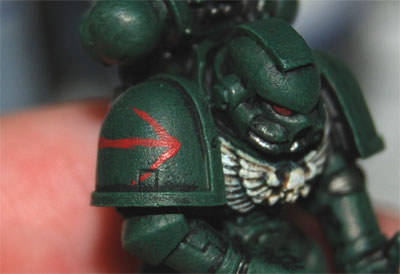
Then I flesh out the arrows.
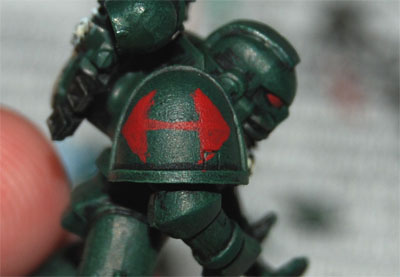
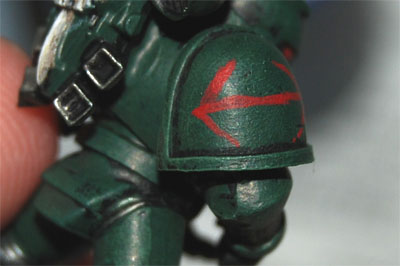
After that, I just flesh out the original line. (Not pictured.)
3. Highlighting
I like to paint some Macharius Solar Orange along some of the edges, just to make the symbols pop out a bit. I deliberately pick out the edges that would be highlighted if the light source was up and to the right. It's not necessarily correct, but it makes the badges stand out more than with just the red, and that makes them more visible on the table.Left knee:
And the right shoulder:
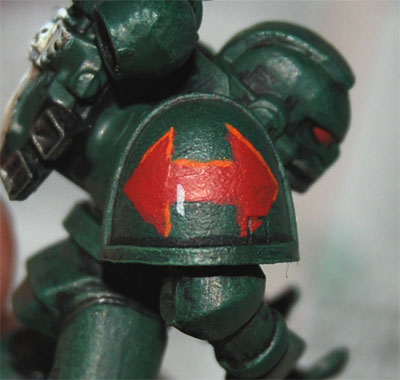
4. Clean up
If I've managed to get any paint where it doesn't belong, this is where I clean it up with more Mechrite Red and Orkhide Shade. But remember, it doesn't have to be perfect. No one will notice small mistakes on the gaming table!5. Squad number, right shoulder pad
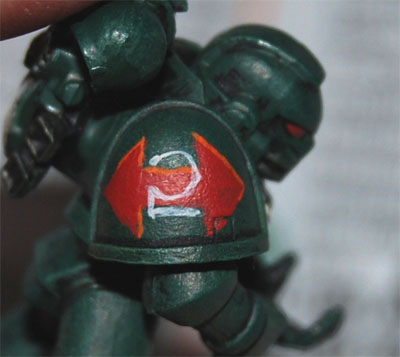
Now, this is the tricky part. I thin my paint at every step, as it's almost impossible to paint thin lines with paint straight from the pot.As I'm currently painting the 2nd squad from 3rd Company, the numeral in this tutorial will be a 2. Other numerals may be the subjects for other tutorials in the future.
Again, to paint this complex numeral, I divide it into simpler shapes and just paint it a step at a time.
I start with Dheneb Stone, as it covers better than Skull White.
Here's the numeral, step by step:
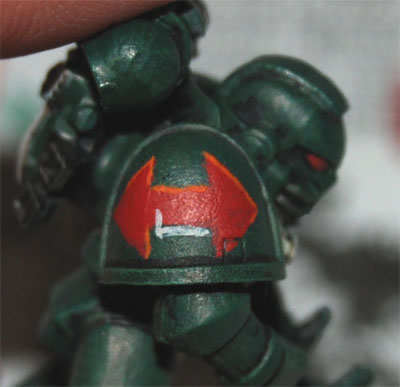
Then I flesh the numeral out a bit with Skull White, adding any small detail that I may have forgotten. (Such as the small uppy-pointy-bit to the right.)

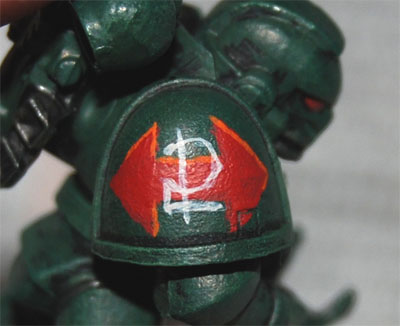
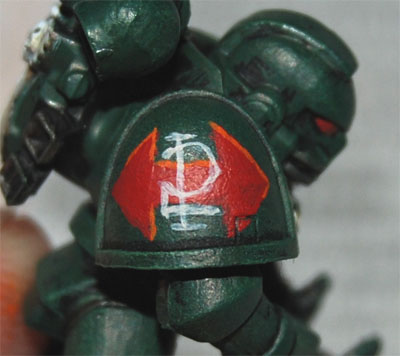
6. Clean up
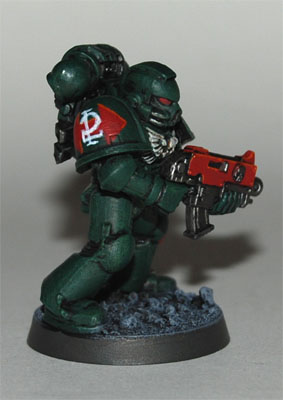
Again, this is where I correct any big mistakes by painting over them with Orkhide Shade and Mechrite Red.Here's the marine, with tactical badge and squad number:
Thanks for reading. Please check out Part 2, for a tutorial on painting the Dark Angels chapter symbol!
If you like or dislike this article, please leave a comment and let me know!
You can also e-mail me at stitch [at] roll2dice [dot] com.
/Stitch


1 comment:
Nicely done !
Post a Comment