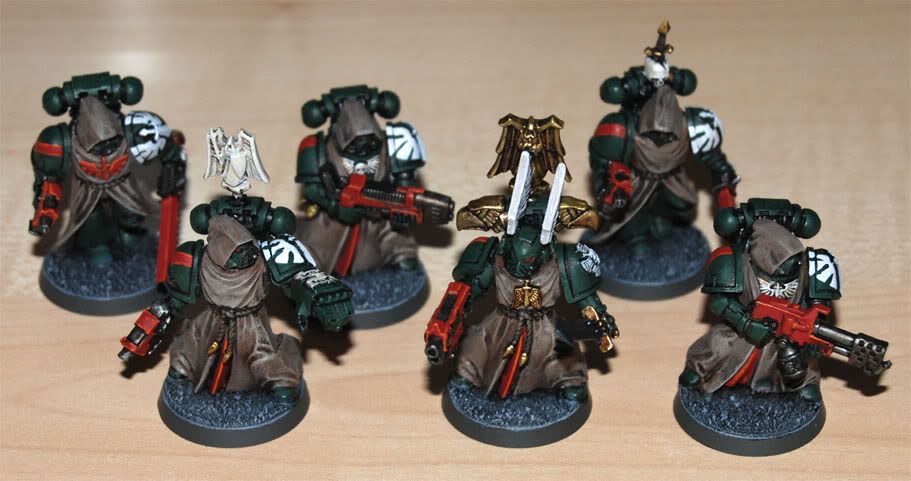
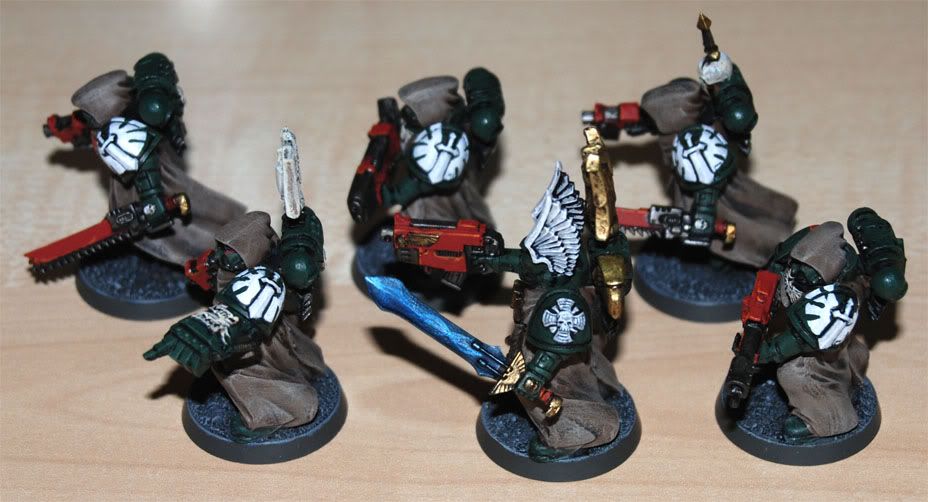
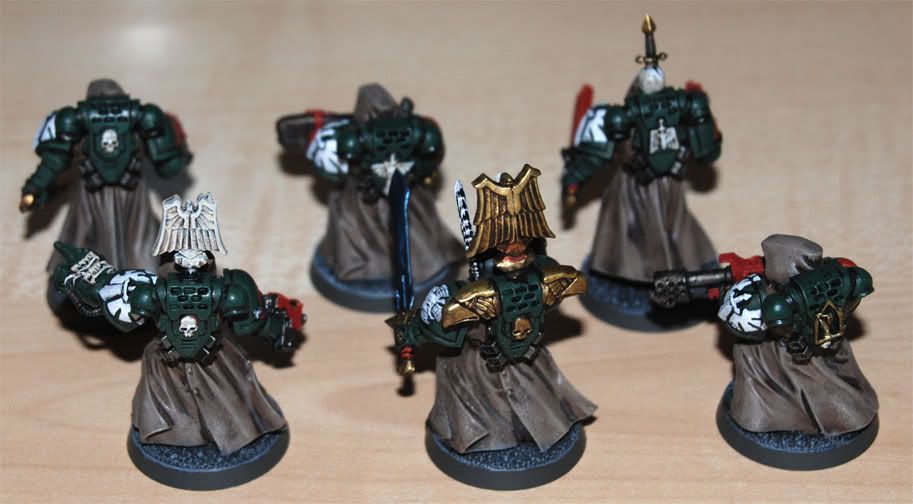
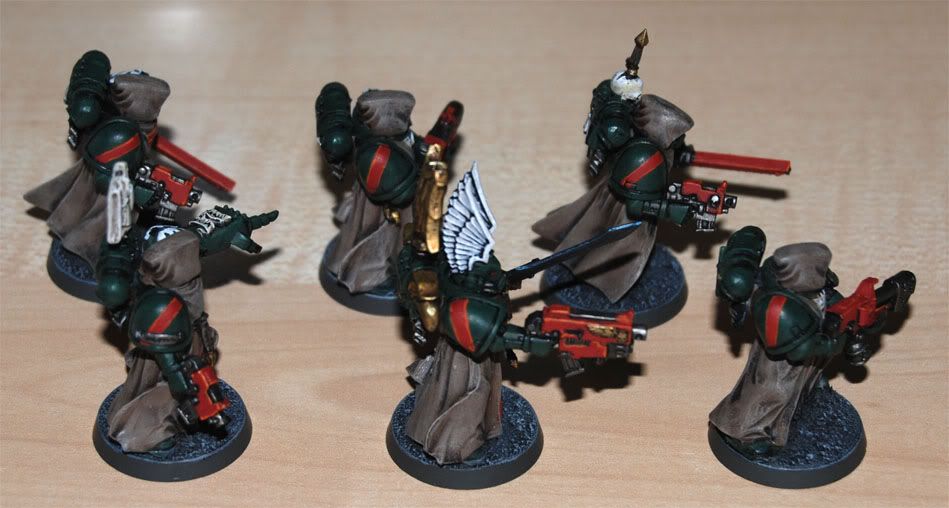
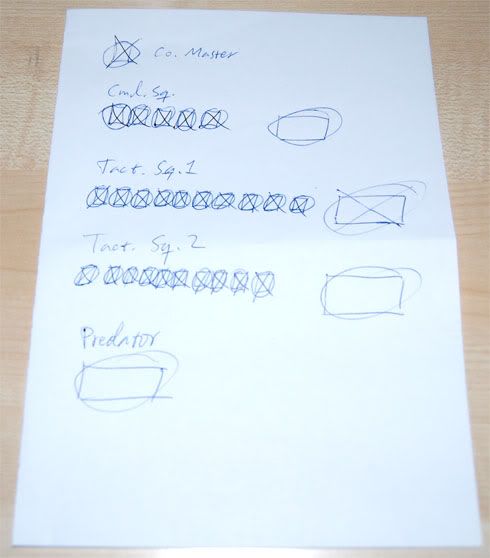
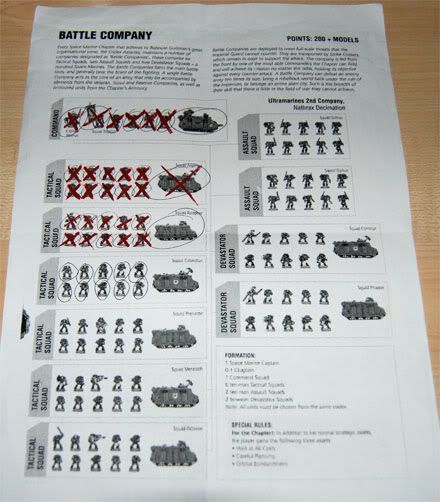
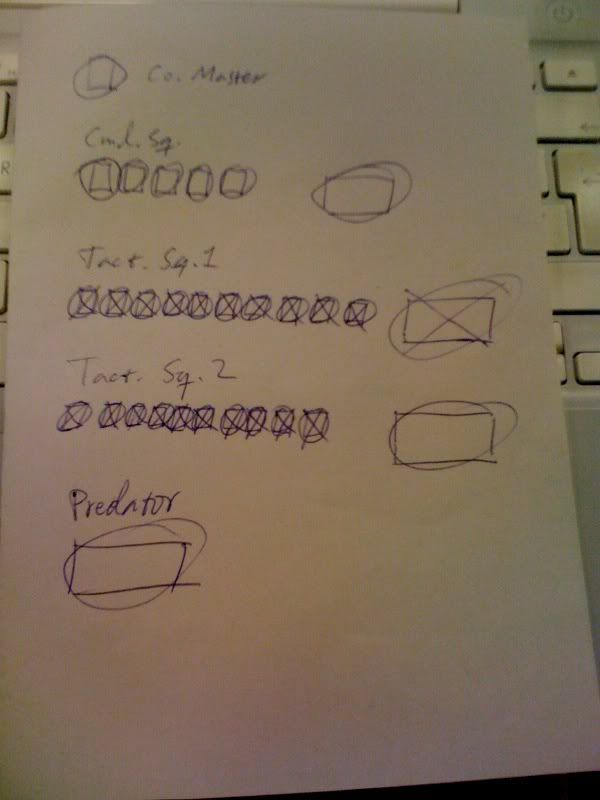
Yes! Tonight, I finished the Company Master and his Command Squad, and it feels really good!
Pictures? Coming up!
That means six more boxes crossed on my 1000pt army Goal Sheet...
...but it also means six more crosses on my Battle Company goal sheet!
The command Razorback is about 35% done, as is the Predator. The second Rhino, though, got some more paint tonight, as well, and is at about 65-70%. I'm hoping to finish it next painting session.
See ya later!
/Stitch
Saturday, 17 October 2009
Saturday, 10 October 2009
Progress Report: Company Master & Command Squad
I'm feeling pretty good after last night's painting session. I got more work done than I'd planned, which is really nice. I can definitely believe this squad will be finished in another session, or two, max.
Here are some pictures:

The Master and the Sergeant (powerfist) are completely done, except for the bases.
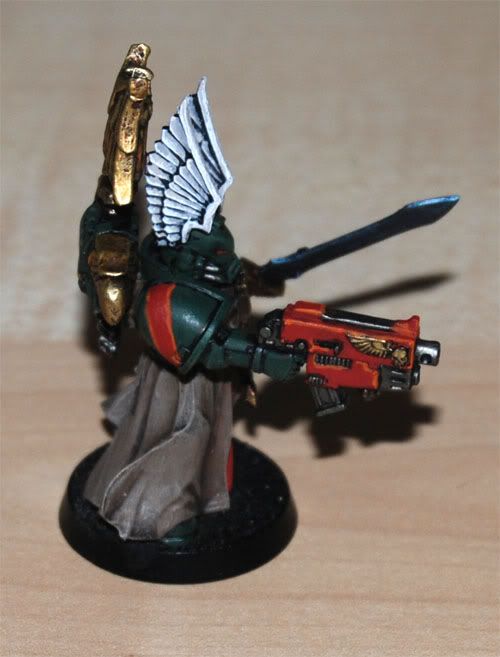
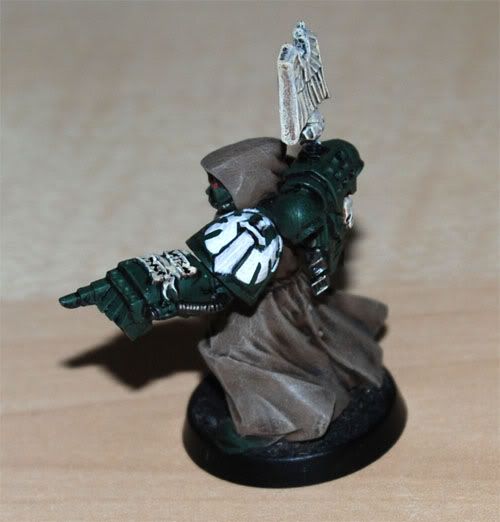
I decided to paint the Company badge on their right shoulder pads, to mark them out as the Command Squad and connect them to the company.
And here's a close-up of the Chapter Badge on the Sergeant:
Already looking forwards to next Friday, when I'll sit down for another painting session!
/Stitch
Here are some pictures:

The Master and the Sergeant (powerfist) are completely done, except for the bases.

I decided to paint the Company badge on their right shoulder pads, to mark them out as the Command Squad and connect them to the company.

And here's a close-up of the Chapter Badge on the Sergeant:

Already looking forwards to next Friday, when I'll sit down for another painting session!
/Stitch
Labels:
3rd co,
badge,
characters,
command squad,
dark angels,
markings,
master,
painting,
progress report,
work in progress
Tuesday, 6 October 2009
New pictures! (Command Squad WIP + Rhino)
Yep, I'm finally going to show you what's been going on lately! :)
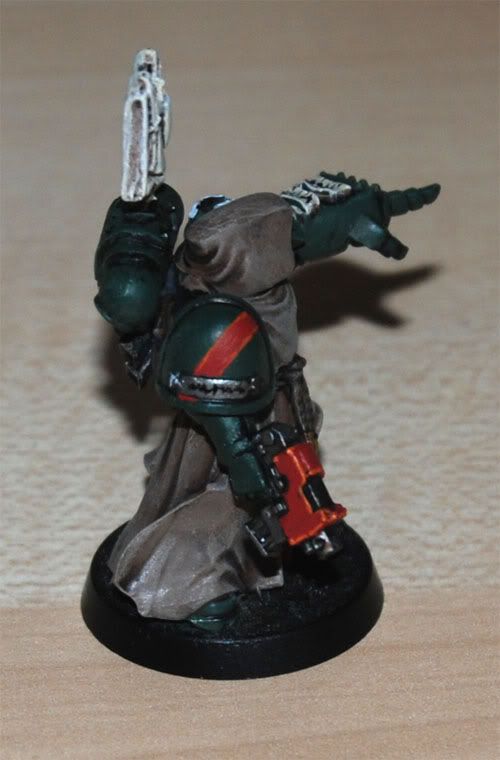
First up, here are the Company Master and his Command Squad, as of yesterday. Actually, I discovered that I lied in my last post. I listed what was left to do, but I forgot about highlighting the red bits, so add that to the list. Here they are, work in progress, remember: (click for bigger picture)

And here's the finished Rhino of 1st Tactical Squad 3rd Company: (click for bigger pictures)
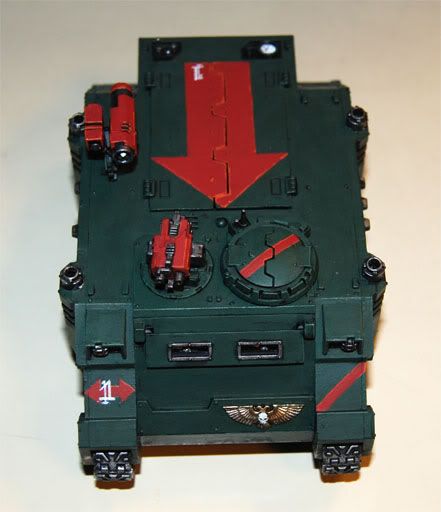
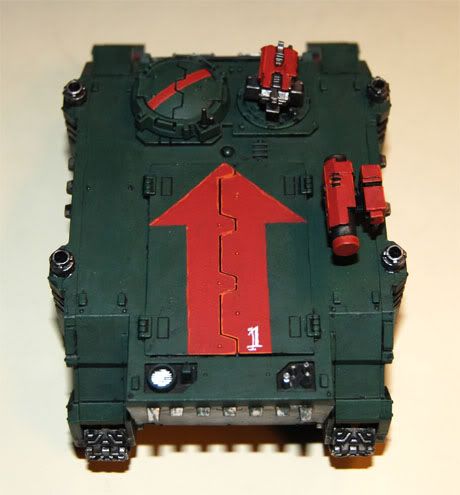
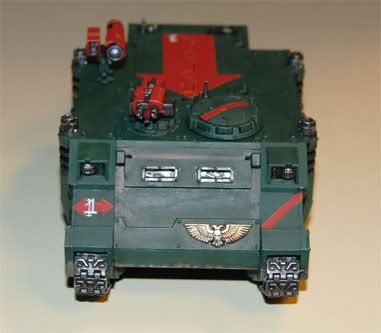
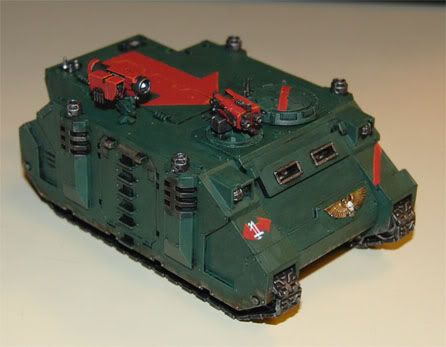
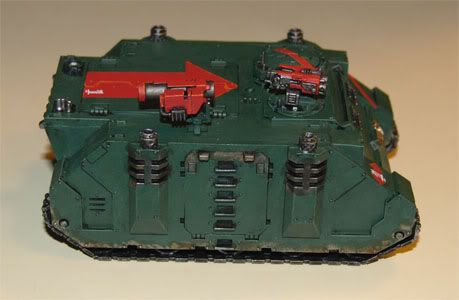
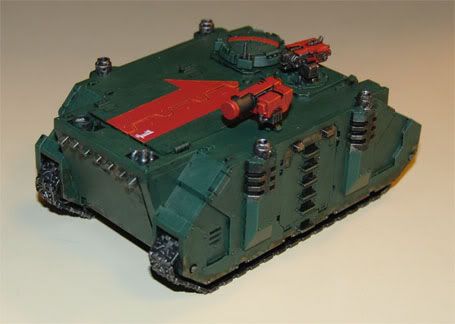
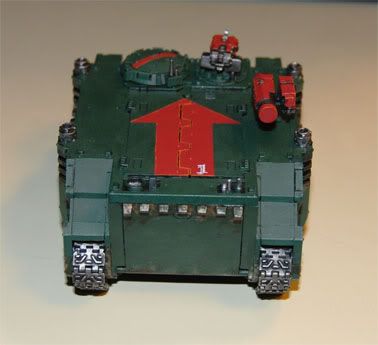
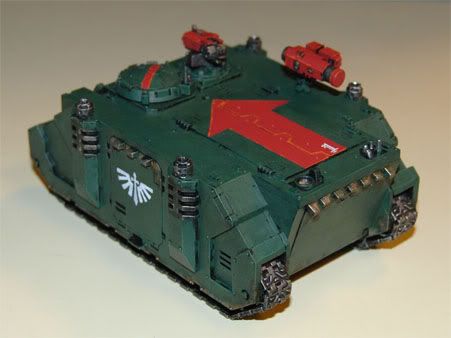
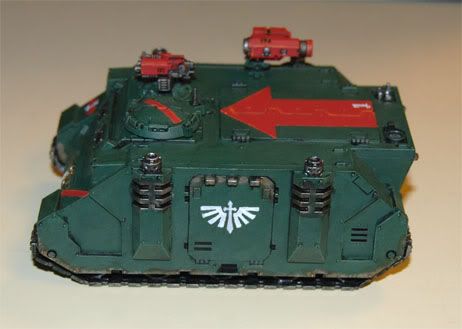
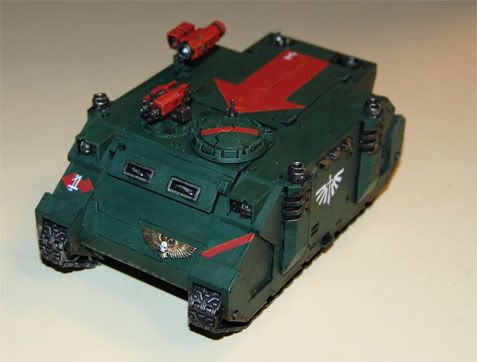
There are a couple of details I'm not 100% happy with: the "1" on the front should be centered, and I think the Chapter Badge on the left door is a bit wonky. But I decided right away that I won't re-do them. It would just waste time, as I think they're "good enough". I honestly think I won't even think about it when the tank is on the table with a bunch of other painted minis. On the whole, I'm just so darned pleased that I'm making progress, and I can't wait to field a completely painted army!
I want to thank Drathmere for his comment on my last post, and encourage everyone to visit his blog: http://40khobbyblog.blogspot.com/ (Great stuff!)
See you soon!
/Stitch
First up, here are the Company Master and his Command Squad, as of yesterday. Actually, I discovered that I lied in my last post. I listed what was left to do, but I forgot about highlighting the red bits, so add that to the list. Here they are, work in progress, remember: (click for bigger picture)

And here's the finished Rhino of 1st Tactical Squad 3rd Company: (click for bigger pictures)


There are a couple of details I'm not 100% happy with: the "1" on the front should be centered, and I think the Chapter Badge on the left door is a bit wonky. But I decided right away that I won't re-do them. It would just waste time, as I think they're "good enough". I honestly think I won't even think about it when the tank is on the table with a bunch of other painted minis. On the whole, I'm just so darned pleased that I'm making progress, and I can't wait to field a completely painted army!
I want to thank Drathmere for his comment on my last post, and encourage everyone to visit his blog: http://40khobbyblog.blogspot.com/ (Great stuff!)
See you soon!
/Stitch
Labels:
3rd co,
command squad,
dark angels,
master,
painting,
progress report,
rhino,
work in progress
Saturday, 3 October 2009
Progress! I'm painting again!
Yes, you read it correctly. I'm painting again, and making good progress. A major motivating factor was this comment on my original Dark Angels Painting Tutorial, so thanks Andrew for the positive feedback!
For the past two months, I've been painting every friday night, and I've actually got som progress to show for it. Unfortunately, I don't have my camera with me right now, so pictures will come later. The camera in my iPhone is worthless for taking pictures of miniatures, but here's a picture of my updated Goal Sheet:
As you can see, both Tactical Squads and one Rhino are now completely done. What you can't see is that everything else is base coated. I didn't finish the army for the Deffcup, of course, but I managed to cover everything in the minimum three colours so I could play in the tournament.
As I said above, I'm now painting every friday night and my Company Master and Command Squad are almost done. The only things left to paint are the wings on the Master's helmet and the squad/company markings on all six marines. Oh, and the bases. I'm expecting to complete them all in two or three more sessions.
Pictures will follow soon, I hope. I also hope to get back into updating the blog more often, but I'm still not going to make any promises I don't know I can keep. :)
/Stitch
Saturday, 8 August 2009
The rumours of my death...
...have been greatly exaggerated... :)
Yes, good people, finally I return to the Angel's Talon. It's been weeks and weeks, and it's great to be back.
I'm not prepared to start promising regular updates yet. I'd feel bad if I couldn't keep those promises. I'd rather under promise and over deliver, than the other way around, so to speak.
Here's the promised tutorial on how to make a Scratch built mount for Hunter Killer Missile.
Hopefully, I'll see you again soon.
Best regards,
Stitch
Friday, 7 August 2009
Tutorial: Scratch built mount for Hunter Killer Missile
I came up with this conversion because I needed more Hunter Killer Missiles to put on my tanks. Well, I had all the missiles I needed, but I didn't have any mounts for them, because I'd used them for the storm bolters.
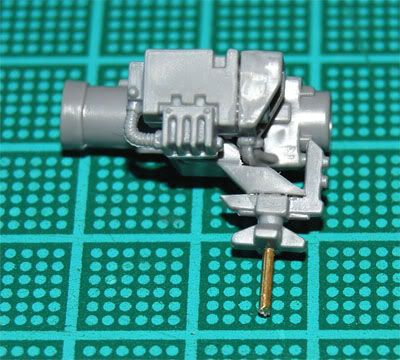
So I decided to make some on my own, and here's how you can make yours.
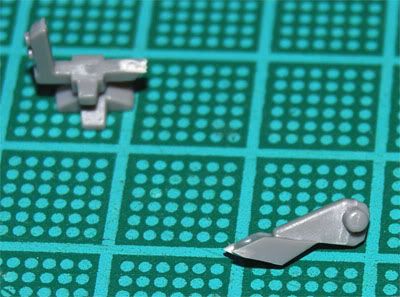
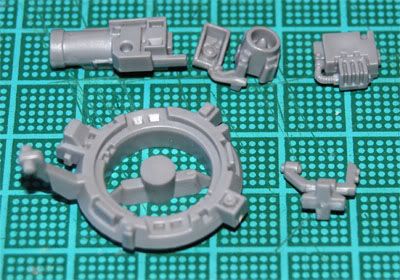 As you can see, except for the actual missile, you only need a couple of bits. The conversion is dead easy to do.
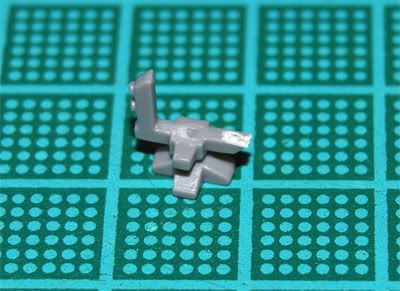
Next, you separate the mount bit from the hatch bit.
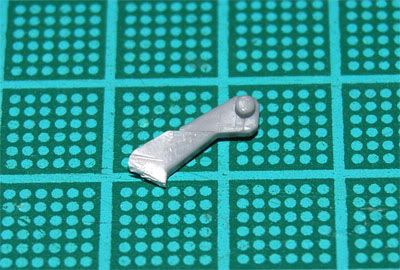
Now, clean up the mount bit with a knife. I made a straight edge, and then I trimmed this as I fitted it to the scanner mount. It'll make a lot more sense later on, so keep reading. Or look at the first photo again, and I think you'll see what I mean.
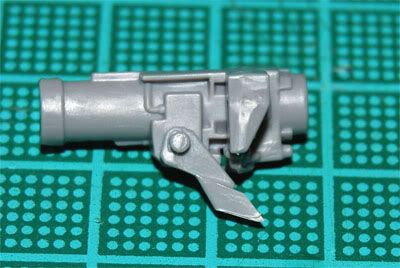
Take the mount bit and do a dry fit on the missile, don't glue it in place.
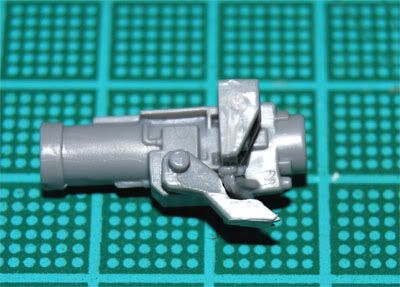
Now you need to trim away some plastic to make the mount sit at the correct angle.
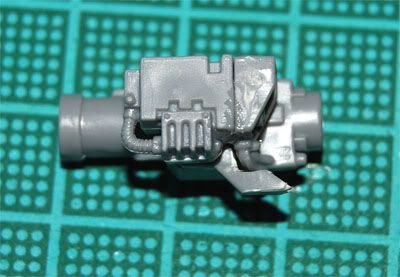
Keep trimming away plastic until it looks right. Then you glue the missile bits in place around the mount bit.
Now you just need to glue the mounted missile onto the scanner mount, and you're almost done.
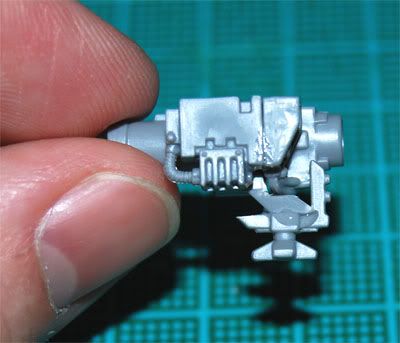
Leave it on its back for a while, to let the glue set.
I want my Hunter Killer Missiles to be removable, for two reasons. One is that it's handy to be able to remove them as you fire them. The other is transportation. If I remove them before packing the tanks in the army transport, I don't risk breaking them off. So, I drill into the mount and glue a pin in place. The pin is just a piece of a metal paper clip.

Next, I drill a hole in a suitable place on the tank...
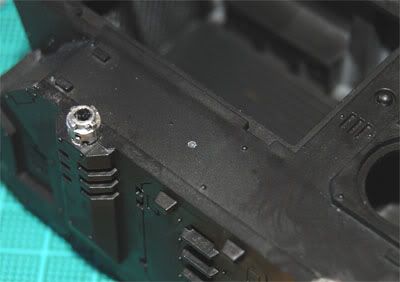
And there you go!
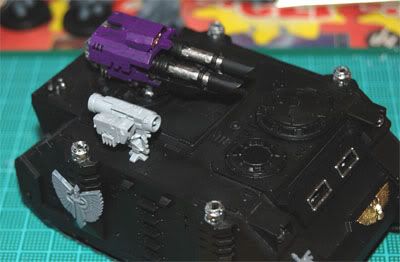
I'm sure there are a million other ways to do this, and if you've got links to tutorials, please share them! For now, though, this is what I'm doing. I think it looks pretty good.
I hope you liked this small tutorial. Please take a minute to leave a comment, it's highly appreciated!
Best regards,
Stitch

So I decided to make some on my own, and here's how you can make yours.
The Parts
These are the parts needed: As you can see, except for the actual missile, you only need a couple of bits. The conversion is dead easy to do.
Cut and Paste
First you take the mount for the "scanner", or small "radar" thingamajig, and cut off the diagonal bit. Make sure you cut it straight, so you'll get one clean edge. Clean it with a knife if needed.
Next, you separate the mount bit from the hatch bit.

Now, clean up the mount bit with a knife. I made a straight edge, and then I trimmed this as I fitted it to the scanner mount. It'll make a lot more sense later on, so keep reading. Or look at the first photo again, and I think you'll see what I mean.

Take the mount bit and do a dry fit on the missile, don't glue it in place.

Now you need to trim away some plastic to make the mount sit at the correct angle.

Keep trimming away plastic until it looks right. Then you glue the missile bits in place around the mount bit.

Now you just need to glue the mounted missile onto the scanner mount, and you're almost done.

Leave it on its back for a while, to let the glue set.
I want my Hunter Killer Missiles to be removable, for two reasons. One is that it's handy to be able to remove them as you fire them. The other is transportation. If I remove them before packing the tanks in the army transport, I don't risk breaking them off. So, I drill into the mount and glue a pin in place. The pin is just a piece of a metal paper clip.

Next, I drill a hole in a suitable place on the tank...

And there you go!

I'm sure there are a million other ways to do this, and if you've got links to tutorials, please share them! For now, though, this is what I'm doing. I think it looks pretty good.
I hope you liked this small tutorial. Please take a minute to leave a comment, it's highly appreciated!
Best regards,
Stitch
Thursday, 11 June 2009
Downgrading the Update Frequency
What?
Yeah, about that update... Because of other stuff going on in my life, one notable example being my bad back, I'm hereby downgrading from regular updates once a month to basically whenever I feel like it.
I think it sucks, but I don't feel I can live up to my goal of updating on the first of every month, so I'm changing it. I feel it's more honest that way.
Much to do this weekend, so the planned updates will have to wait until next week.
/Stitch
Friday, 5 June 2009
Comments & Answers
Hi all!
Thanks to everyone who took the time to leave comments. It's much appreciated. Keep 'em coming!
RonSaikowski said:
>>> Great tutorial.
I would have never thought to do the shoulder pads themselves.
Thanks! Yeah, the shoulder pads are a bit of a bother, since you often just get exactly the amount you need. With Tactical marines, you always have more than enough...
Another way to do it is to glue the shoulders (with shoulder pads) in place on the torso, and cut the arms just below the shoulders and put the magnets there. I plan on trying this for a future project.
Oh, and thanks for accepting me into the From the Warp blogger group!
Gurf said:
>>> You have inspired me to make my own Goal Sheet as I prepare for Deffcup.
Cool!
And by the way, what are you planning to use as objectives for Deffcup(if any)?
We built and painted some Dark Angels themed objectives for the Apocalypse battle and I'll be borrowing them.
your Master looks awesome, and I really like the command squad so far.
Thanks! Yeah, I'm pretty pleased with how the whole squad turned out.
However I think that the cloak on the sergeant of the 2nd Tactical Squad looks a little too brown.
Yeah, I changed my painting method for the robes for the 2nd Vet. Sergeant. I wanted the robes to look a bit more like heavy leather instead of cloth. I imagine they have two different sets of robes. Let me explain... I'm thinking it makes sense to have a set of nice ceremonial robes, or "dress robes", like in Harry Potter. :) On the battlefield, I'm thinking the robes needs to be heavier and tougher, hence the cracked leather look. So that's my reasoning behind the new look.
By the way, thanks for the game last week, it was great fun! And thanks for catching the typo, too!
And thanks for the positive comments on my latest magnetic tutorial, Special Weapon Swaps made Easy with Magnets!
the black templar said:
>>> great looking minis ;)
Thanks! And I'm really impressed with your Black Templars as well!
Everyone: Make sure you check out Jocke's blog: A Templar's Quest
See you soon!
/Stitch
Monday, 1 June 2009
New updates this week
Hi all!
I'm not quite done with the June updates, but they will be online later this week. And, I'm having trouble posting using Firefox. Anyone else experiencing this?
Anyway, here's what's coming:
See you soon!
/Stitch
I'm not quite done with the June updates, but they will be online later this week. And, I'm having trouble posting using Firefox. Anyone else experiencing this?
Anyway, here's what's coming:
- Comments and answers
- Tutorial: Custom mount for Hunter-Killer Missile
- DeffCup update
- WIP pictures
See you soon!
/Stitch
Friday, 1 May 2009
Special Weapon Swaps made Easy with Magnets
If you read my blog last month, you'll already know that I like magnets. If you haven't read about magnetizing Terminator arms, you can find the posts here:
Here's a tutorial on how you can magnetize your special weapons on ordinary Space Marines to make it easy to swap them out between battles!
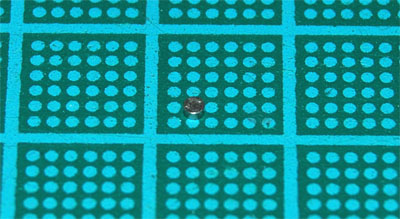 This one is from K&J Magnetics and is 1/16" x 1/32".
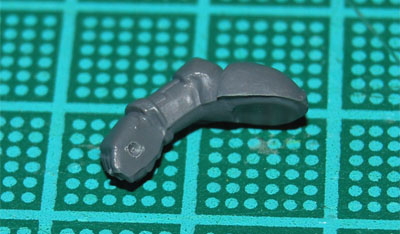 Now you expand the pit and make it deeper, using a 2mm drill. Try to fit a magnet in the hole now and then, and just keep expanding the hole until the magnet fits. You want it sunk deep enough to be level with the edge of the hand, you don't want it sticking up. When the hole is big enough, you glue a magnet in place.
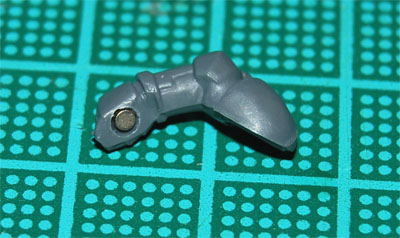 NOTE! You need to watch the polarities of the magnets so they actually attract each other. For the very first magnet you glue in place, this doesn't mean a thing. But after the first, this gets VERY important.
Now we do the same thing with the chosen weapon. Drill a guide...
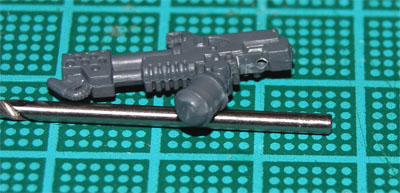 And expand the hole...
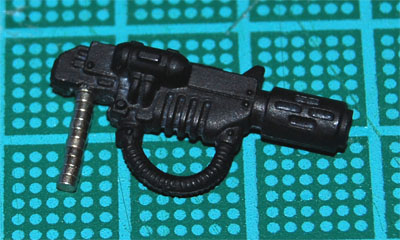
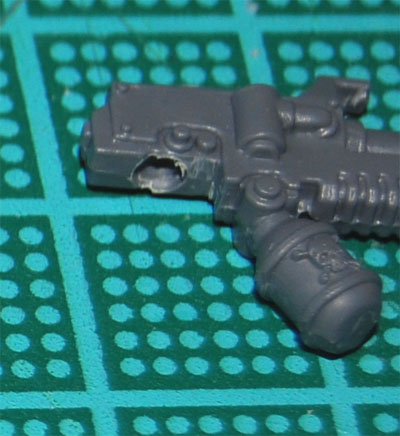 Now, here's a tip on how to keep the polarities correct. Use a stack of magnets as a sort of handle.
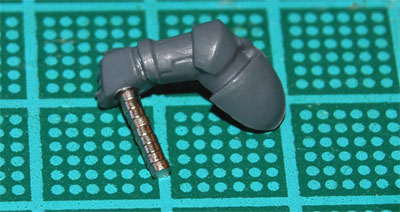 When you glue the magnet in place in the weapon, you'll know that the polarities are correct.
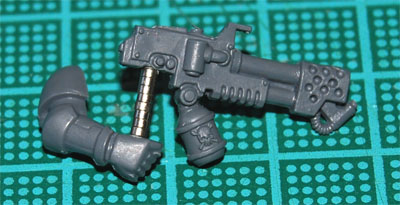 After the glue is dry, you just remove the excess magnets and you're done! The left hand doesn't need a magnet, the weapon will stay in place anyway.
So, you just glue the arms in place on the model as you normally would. But now, with a few more weapons and magnets, you have the option of switching special weapons between games.
Again, remember what I said about polarities, or you may end up with weapons that attach to some figures and not to others. Whenever I glue a magnet into a new arm, I use a weapon as a handle. That way, I know all my weapons will fit all my figures!
 Here are a couple of Veterans from a Command Squad I'm currently working on:
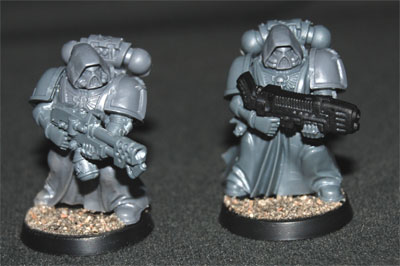
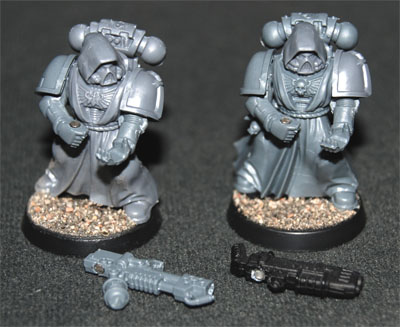
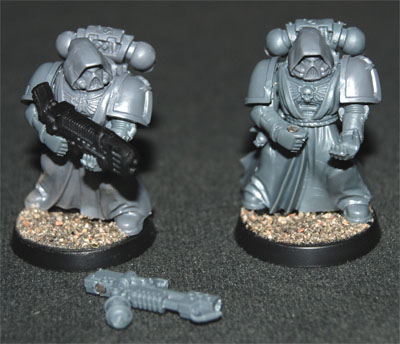 As you can see, switching special weapons is a piece of cake!
I hope you found this tutorial helpful. Even if you didn't, comments are always welcome, so keep 'em coming! :)
/Stitch
- Terminator Weapon Swaps made Easy with Magnets, Part 1
- Terminator Weapon Swaps made Easy with Magnets, Part 2
- Terminator Weapon Swaps made Easy with Magnets, Part 3
Here's a tutorial on how you can magnetize your special weapons on ordinary Space Marines to make it easy to swap them out between battles!
Stuff you need
You need a couple of small drills, I use a 1.5mm and a 2mm. And of course, you need some magnets. This one is from K&J Magnetics and is 1/16" x 1/32".
Let's go!
First, drill a small guide "pit", using a small drill. The reason I do this is because it is easier to hit the spot you want. I find that I often miss the spot when I go for the bigger drill right away, without the guide. Now you expand the pit and make it deeper, using a 2mm drill. Try to fit a magnet in the hole now and then, and just keep expanding the hole until the magnet fits. You want it sunk deep enough to be level with the edge of the hand, you don't want it sticking up. When the hole is big enough, you glue a magnet in place.
 NOTE! You need to watch the polarities of the magnets so they actually attract each other. For the very first magnet you glue in place, this doesn't mean a thing. But after the first, this gets VERY important.
Now we do the same thing with the chosen weapon. Drill a guide...
 And expand the hole...
 Now, here's a tip on how to keep the polarities correct. Use a stack of magnets as a sort of handle.
 When you glue the magnet in place in the weapon, you'll know that the polarities are correct.
 After the glue is dry, you just remove the excess magnets and you're done! The left hand doesn't need a magnet, the weapon will stay in place anyway.
So, you just glue the arms in place on the model as you normally would. But now, with a few more weapons and magnets, you have the option of switching special weapons between games.
Again, remember what I said about polarities, or you may end up with weapons that attach to some figures and not to others. Whenever I glue a magnet into a new arm, I use a weapon as a handle. That way, I know all my weapons will fit all my figures!
 Here are a couple of Veterans from a Command Squad I'm currently working on:

 As you can see, switching special weapons is a piece of cake!
I hope you found this tutorial helpful. Even if you didn't, comments are always welcome, so keep 'em coming! :)
/Stitch
Labels:
converting,
magnets,
modeling,
space marines,
tutorial
Progress Report: DeffCup 2009 1000pt Army
Time for a progress report. The tournament is about six weeks away and I'm a bit nervous! I haven't gotten any painting done in quite a while, but all the models are assembled. Is six weeks going to be enough for me to paint four tanks and 14 infantry? I think so, but I really need to get cracking!
So, here's what my Goal Sheet looks like as of 29 April:
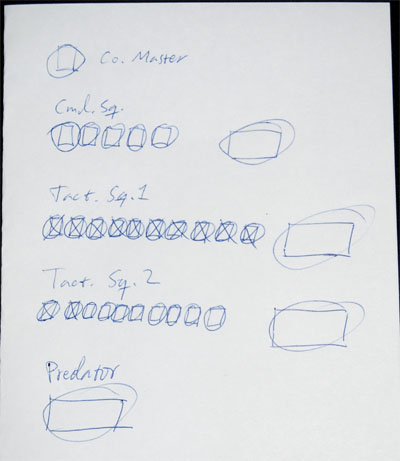 Here are some photos:
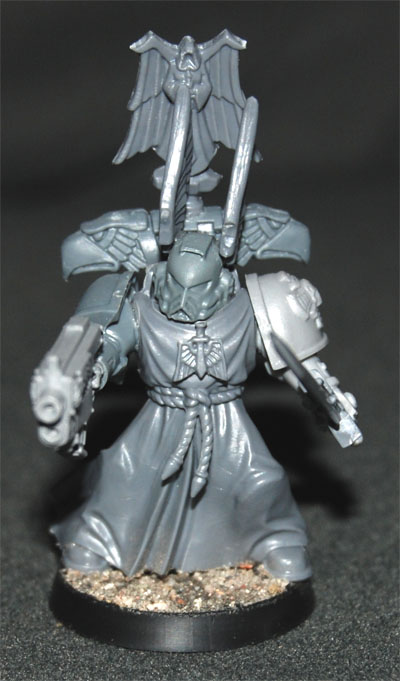 Master of the 3rd Company. Ready for primer.
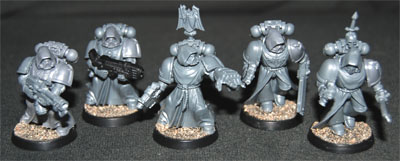 Command Squad of the 3rd Company. Ready for primer.
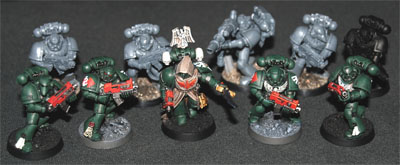 2nd Tactical Squad of the 3rd Company. Two marines done. One primed, four ready for primer. Three almost done.
 Predator, Command Razorback and two Rhinos. These have all been scavenged from one of my unfinished projects, the DIY Space Marine Chapter the Knights Repentant. They will all be re-primed in black. I have added Hunter Killer Missiles to them all. The one on the Predator is held in place with magnets and the others are pinned, but not glued, in place, so they can all be removed for easy storage without breaking them. You probably can't see it in this picture, but three of the HKM's have custom made mounts, and these will be the topic of one of next month's updates!
Six weeks.... I better get painting!
/Stitch
So, here's what my Goal Sheet looks like as of 29 April:
 Here are some photos:
 Master of the 3rd Company. Ready for primer.
 Command Squad of the 3rd Company. Ready for primer.
 2nd Tactical Squad of the 3rd Company. Two marines done. One primed, four ready for primer. Three almost done.
 Predator, Command Razorback and two Rhinos. These have all been scavenged from one of my unfinished projects, the DIY Space Marine Chapter the Knights Repentant. They will all be re-primed in black. I have added Hunter Killer Missiles to them all. The one on the Predator is held in place with magnets and the others are pinned, but not glued, in place, so they can all be removed for easy storage without breaking them. You probably can't see it in this picture, but three of the HKM's have custom made mounts, and these will be the topic of one of next month's updates!
Six weeks.... I better get painting!
/Stitch
Labels:
3rd co,
dark angels,
deffcup,
goal sheet,
magnets,
next update,
space marines,
tournament,
work in progress
Subscribe to:
Comments (Atom)
